
Reviewed · NARA DAY TRIPS FROM OSAKA
Osaka-Nara: 2-Day Discovery Pass
One QR code, lots of Osaka and Nara stops.
This pass is built for people who like to move fast without juggling separate tickets, with free admission at a long list of sights across Osaka and Nara. I especially like the mix of big-view landmarks like Umeda Sky Building and the classic temple stop at World Heritage Gangoji Temple. I also like the practical setup: you use a digital QR-style ticket to get in, and the pass is anchored right at HEP FIVE for easy planning and food breaks.
The main drawback is timing. Some attractions have hard cutoffs, including a 5:00 PM limit for the Floating Garden Observatory, and the pass is not a true full 48 hours from your first scan. If you go after the cutoff, you can end up paying extra—an issue that has hit the Umeda Sky side specifically.
In This Review
- Key things to know before you go
- Price and value: $24 that can pay off quickly
- Where the pass fits: HEP FIVE as your Osaka launchpad
- The northern route plan: Osaka views, tower fun, and river time
- Umeda Sky Building and Floating Garden Observatory: go early or you pay
- HEP FIVE Ferris Wheel and HEP FIVE around-you options
- Tsutenkaku Tower and Tower Slider: Osaka landmark energy
- Cruises: Aqua Liner and Santa Maria style day/twilight routes
- Temples and heritage stops: Shinyakushiji, Saidaiji, and Gangoji
- ISUIEN Garden Neiraku Museum of Art: art + garden pairing
- Nara stops inside the northern plan: museums and quirky collections
- Photography and calligraphy: Irie Taikichi and Kason Sugioka
- Reptiles, goldfish, and people-watching-friendly breaks
- Salon Naramachi Store: a lighter end to the day
- Southern route: temples, onsen, and caves, with a rental car requirement
- Bicycle and sports culture: Shimano Bicycle Museum and cycle centers
- Onsen stops: Inunakiyama Onsen and more hot baths
- Kishiwada Castle and other “place” landmarks
- Big temple names: Abe Monju-in, Hasedera, Murouji, Kinpusenji
- Kashihara archaeology and cave time: Ishibutai and Menfudo
- Katsuragi sumo museum: Kehayaza
- Timing rules that can make or break your savings
- The pass is not a full 48 hours
- You get one entry per facility, no re-entry
- After one facility, wait at least 30 minutes
- Floating Garden Observatory is the landmine
- Dark mode and the scan experience
- Group use rule: facilities collectively
- Included add-ons with combo options
- Maintenance note: plan around the HEP FIVE Ferris Wheel inspection
- Should you book the Osaka–Nara Discovery Pass?
- FAQ
- How much does the Osaka–Nara 2-Day Discovery Pass cost?
- Where is the pass located for pickup or use?
- Is the pass valid for a full 48 hours?
- Can I re-enter the same facility more than once?
- Is Umeda Sky Building free all day with the pass?
- Does the pass include train and bus fares?
Key things to know before you go
- Two routes, different styles: A northern Osaka-heavy route plus a southern temple-and-onsen route
- One entry per facility: No re-entry, so you need a clear plan
- Strict timing rules: The pass works by opening-to-closing windows, not a simple 48-hour clock
- Floating Garden Observatory has a 5:00 PM limit: Plan that stop early
- Southern route needs a rental car: You have to arrange that separately
- HEP FIVE is your base: You’re surrounded by food and entertainment while you hop between sights
The deer will still bow: more Nara days
Price and value: $24 that can pay off quickly
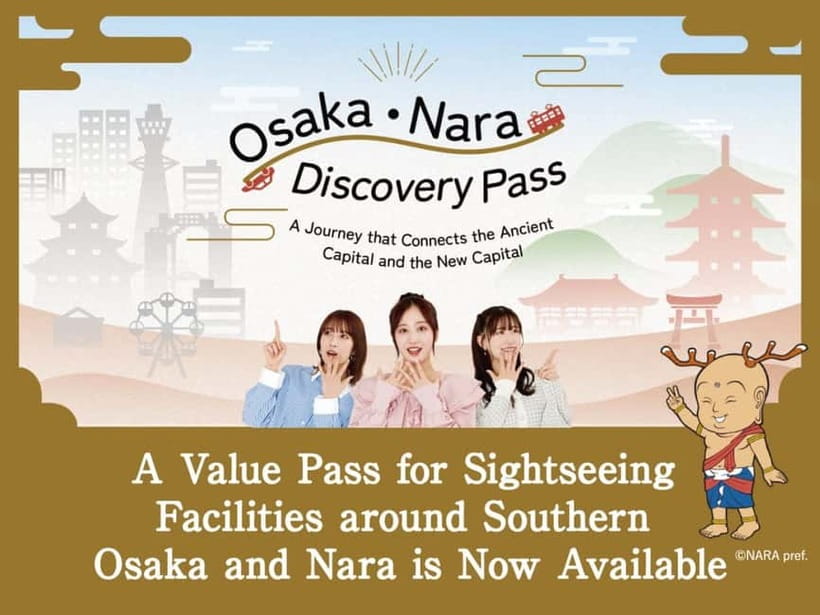
At $24 per person, the value is all about whether you stack enough included attractions during your two days. This is not a “cover everything in Osaka and Nara” type of deal. It’s more like a buffet: you’ll feel the savings when you actually fill your plate with multiple stops that normally cost money.
If you’re the type who likes viewpoints, museums, and temples in one compact trip, this pass can make your days easier to structure. The good sign is the sheer number of included entries (17 on the northern route, 19 on the southern route). The caution sign is that the pass has rules that can reduce savings if you stumble into the wrong timing—especially around the 5:00 PM cutoff.
Also remember what’s not included: public transportation costs (trains and buses). The pass helps with admission fees, not getting you everywhere for free. So your best value comes when you can group stops efficiently within each area.
Where the pass fits: HEP FIVE as your Osaka launchpad
This discovery pass is tied to HEP FIVE Mall (it’s located there). That matters more than it sounds. When you’re bouncing between multiple attractions, having a consistent base reduces the mental load. You can grab a snack, use a restroom, and re-check your next entry window without wandering too far.
HEP FIVE also helps you build a tight northern-route plan. The northern list includes several major Osaka hits near the Umeda/central area—so you can treat this as your “home base” while you move outward and back.
One more heads-up: the pass also includes the HEP FIVE Ferris Wheel, but it has been scheduled to be out of service on Thursday, August 7 due to inspection, with no fixed restart time. If your dates include that Thursday, build a backup plan and don’t count on the wheel for your schedule.
The northern route plan: Osaka views, tower fun, and river time
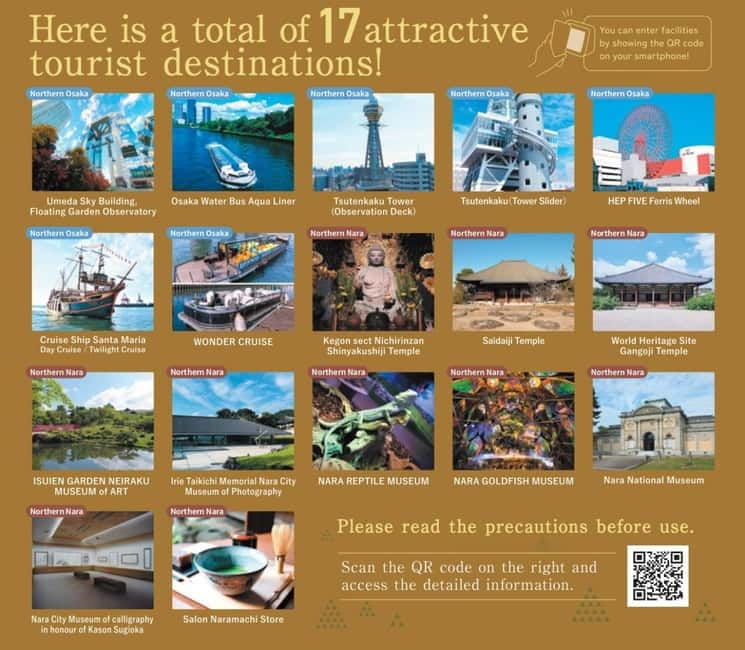
The northern route is where this pass feels most straightforward. It focuses heavily on Osaka attractions—so you can do a lot of sightseeing without the southern-route car requirement. On this route, you get admission to 17 attractions, including Umeda, Tsutenkaku, cruises, temples, gardens, and a run of Nara museum stops.
Put this one next to a few other Osaka options first:
Umeda Sky Building and Floating Garden Observatory: go early or you pay
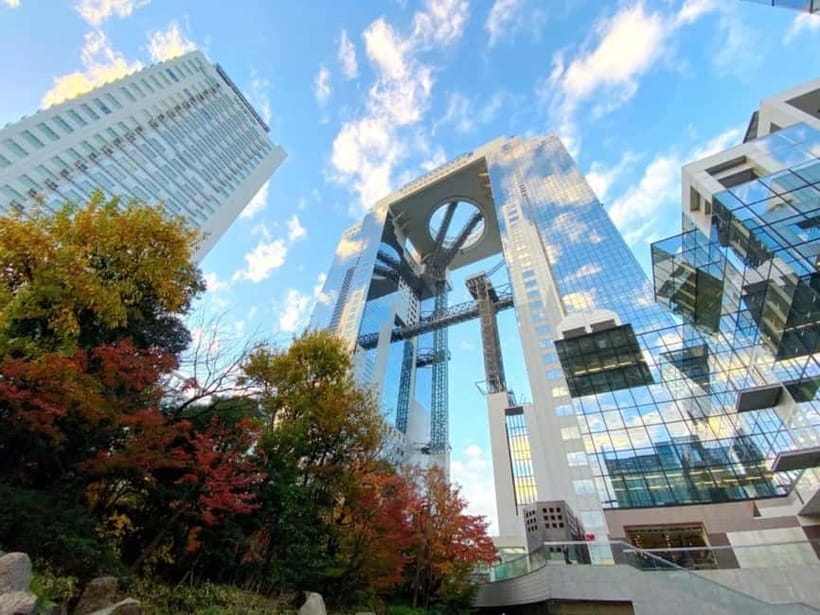
This is the stop that deserves the most planning attention. The pass includes entry to Umeda Sky Building and the Floating Garden Observatory, but the pass only gives free admission before 5:00 PM.
I’d treat this as your Day 1 anchor (or your earliest stop on Day 2). If you arrive late, you lose the free benefit and risk paying a big chunk of the ticket cost instead. One of the roughest experiences reported centers on this exact cutoff and how the free-entry window is described. So your safest move is simple: schedule this observatory before 5:00 PM, even if it means starting earlier than you wanted.
HEP FIVE Ferris Wheel and HEP FIVE around-you options
After Umeda, HEP FIVE itself is an easy “rest and reset” zone. Even if you skip the Ferris Wheel on an inspection day, you still get the convenience of being in a mall with food and entertainment while you prepare for the next stop.
If the Ferris Wheel is operating on your day, it’s an easy add-on because you’re already there.
Tsutenkaku Tower and Tower Slider: Osaka landmark energy
Tsutenkaku Tower is the classic Osaka landmark style stop, with an observation deck. The pass also covers Tsutenkaku (Tower Slider), which is the fun add-on for people who want more than a look-out photo.
Practical tip: Tsutenkaku is a natural “midday to late afternoon” area in many itineraries because you can pair the tower with your walking time and then shift to other nearby attractions without needing complicated transfers.
Cruises: Aqua Liner and Santa Maria style day/twilight routes
The northern list includes several water options:
- Osaka Water Bus Aqua Liner
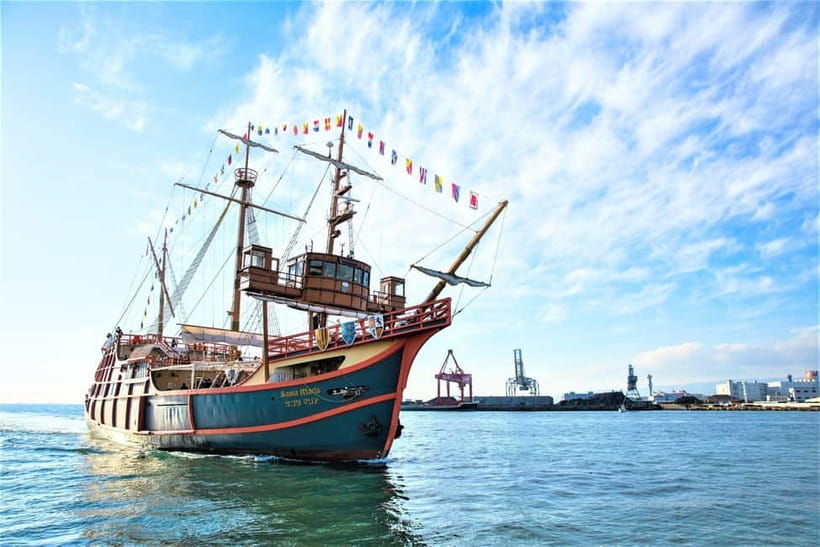
- Cruise Ship Santa Maria Day Cruise
- Cruise Ship Santa Maria Twilight Cruise
- WONDER CRUISE
If you like changing perspectives, river time is a smart break. It can also help you avoid stacking indoor-only places back-to-back.
What I’d watch: these cruises are time-based. Your pass timing rules mean you’ll want your cruise to fit smoothly with your other planned entries.
Temples and heritage stops: Shinyakushiji, Saidaiji, and Gangoji
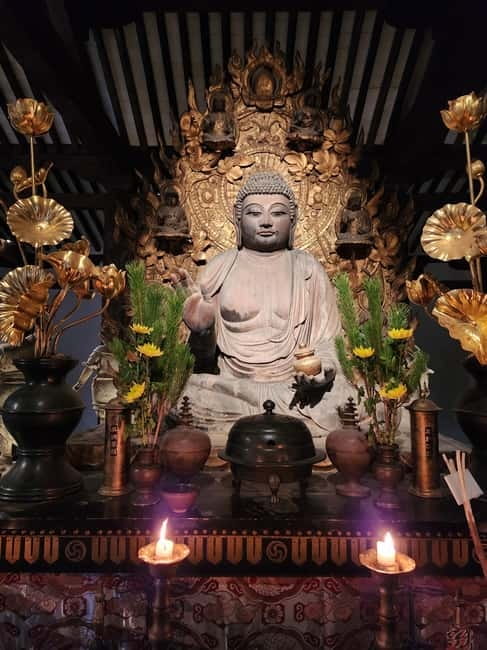
This route also includes Kegon sect Nichirinzan Shinyakushiji Temple, Saidaiji Temple, and World Heritage Site Gangoji Temple. When you’re using a pass like this, temples are often where the value shows up best—because they’re not just photo stops. They give you a sense of place and pacing, and they’re usually easy to visit in a single focused chunk of time.
Gangoji Temple is especially meaningful because it’s explicitly listed as a World Heritage Site. If you want one “slow down” moment built into your tight itinerary, this is a strong candidate.
ISUIEN Garden Neiraku Museum of Art: art + garden pairing
The pass includes ISUIEN Garden Neiraku Museum of Art. The pairing matters because you can switch modes quickly: you can enjoy outdoor garden atmosphere and then move into art. Even if you’re not a hardcore museum person, it’s a gentle way to stay engaged.
Nara stops inside the northern plan: museums and quirky collections
On the northern route list, you’ll also find several Nara museum entries and specialty spots. This is where the pass can feel almost like a “choose your vibe” menu.
Photography and calligraphy: Irie Taikichi and Kason Sugioka
You get admission to:
- Irie Taikichi Memorial Nara City Museum of Photography
- Nara City Museum of calligraphy in honour of Kason Sugioka
- Nara National Museum
These picks are good for people who want culture that isn’t only about temples. If you’ve spent the morning on viewpoints or towers, Nara’s museum grouping gives your feet a break while still feeling like you’re experiencing something real.
Reptiles, goldfish, and people-watching-friendly breaks
The northern route includes:
- NARA REPTILE MUSEUM
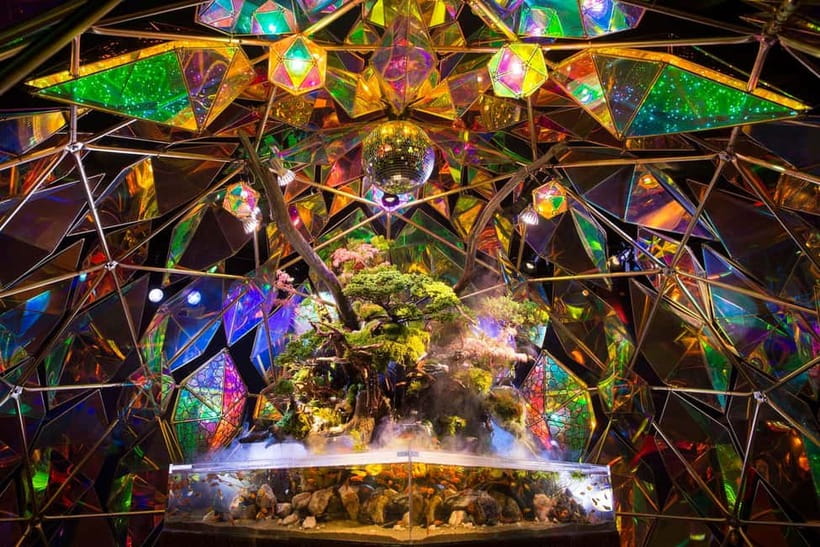
- NARA GOLDFISH MUSEUM
I like these kinds of stops because they’re simple, fast to digest, and easy to enjoy even if you’re not sure what you’re walking into. They also work well as a “between big sights” buffer.
Salon Naramachi Store: a lighter end to the day
The list includes Salon Naramachi Store. This sounds like a more casual stop compared to the museums and heritage temple, which makes it a good way to end a day without committing to another major timed experience.
Southern route: temples, onsen, and caves, with a rental car requirement
The southern route is where the trip turns more adventurous and spread out. You get admission to 19 attractions, but you must book a rental car separately. That’s a huge practical detail, and it’s the reason this route isn’t ideal for everyone.
If you love onsen culture and don’t mind longer drives between stops, the southern route can feel like a full day or two of variety. If you’re relying on public transport, this route may become frustrating because the pass itself says public transportation isn’t covered.
Bicycle and sports culture: Shimano Bicycle Museum and cycle centers
The southern list includes Shimano Bicycle Museum and Kansai Cycle Sports Center. This is a good tonal shift from temples. If you’re traveling with anyone who likes bikes or sports, you’ll likely appreciate how different these are from the usual Osaka and Nara “big classics.”
Onsen stops: Inunakiyama Onsen and more hot baths
The southern route includes:
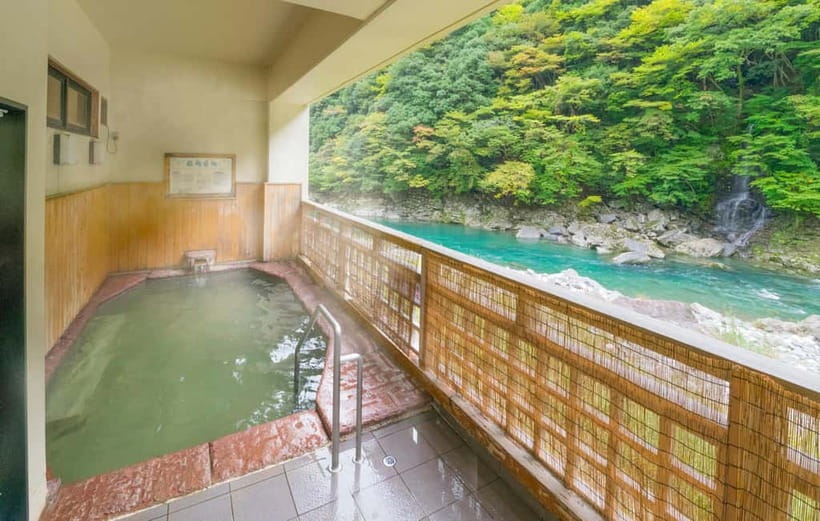
- Inunakiyama Onsen Fudoguchikan
- Kigi-no-Yu (Ten-no-Kawa Onsen Hot Spring Center)
- Mizuha-no-Yu (Tenkawa Herbal Bath Center)
- Dorogawa Onsen Hot Spring Visitor Center
I like that the pass doesn’t treat onsen as an afterthought—it’s built into the route. Even if you don’t plan to spend ages in the water, these stops can become meaningful relaxation points between sightseeing blocks.
Kishiwada Castle and other “place” landmarks
You also get Kishiwada Castle and Ishibutai Tumulus (plus Yoshimizu Shrine). These are the kinds of stops that help you understand how the region grew, not just what it looks like today.
Big temple names: Abe Monju-in, Hasedera, Murouji, Kinpusenji
The southern route includes:
- Abe Monju-in Temple
- Okadera Temple
- Nara Hasedera
- Murouji Temple
- Kinpusenji Temple
And you also get Murou Art Forest (which pairs naturally with temple time as a more varied stop).
If you want your pass to include at least a few major spiritual sites, this is the route to pick. Nara Hasedera is included by name, and grouping temples together is usually the easiest way to keep your day from feeling like random driving.
Kashihara archaeology and cave time: Ishibutai and Menfudo
You get The Museum, Archaeological Institute of Kashihara, Nara Prefecture and Ishibutai Tumulus. Then there’s an attraction that sounds made for curiosity:
- Menfudo Limestone Cave / Monorail, the Dorokko
If you’re the type who likes “unusual venue” sightseeing, caves and themed rides can break up the temple rhythm nicely.
Katsuragi sumo museum: Kehayaza
The southern route includes Katsuragi City Sumo Museum “Kehayaza”. This is a fun way to add a Japanese sport angle without it feeling like a detour.
Timing rules that can make or break your savings
This pass comes with rules that are easy to miss, and they matter. Here’s how to keep the experience smooth.
The pass is not a full 48 hours
The pass is valid from the facility’s opening time to the final entry time on the day of use and the following day. It’s not a simple “start whenever and go for 48 hours.”
So don’t assume that scanning on the first morning automatically buys you free access until the second morning. Instead, treat it like two day-entries inside specific venue windows.
You get one entry per facility, no re-entry
Each facility can be used once within the two-day period, limited to the day of use. Re-entering the same facility isn’t allowed.
That means you should choose your must-do within each venue category. If you love a museum but want a second pass through later, this ticket won’t support that.
After one facility, wait at least 30 minutes
You must wait at least 30 minutes after visiting one facility before entering another. This rule is usually manageable, but it can affect tight planning if you’re trying to stack locations too aggressively.
Floating Garden Observatory is the landmine
Because the Floating Garden Observatory free entry is only valid before 5:00 PM, this is the one spot you should schedule first among your late-day plans. If you want that view without paying extra, timing becomes part of the itinerary, not just a detail.
Dark mode and the scan experience
The pass guidance says to disable dark mode. That’s a small tech note, but it can prevent scan trouble at the entrance. If your phone normally sits in dark mode, switch it off before you start.
Group use rule: facilities collectively
One more odd rule: all participants are required to use the facilities collectively, and individual use is not allowed. If you’re going solo, double-check how that rule works in practice before you commit. It could affect how freely you can split up and roam between venues.
Included add-ons with combo options
The pass can come with rail and local transit add-ons, but only when you select specific combos:
- Osaka Metro & Osaka City Bus Pass (1-Day Ticket) is included only when you choose the Osaka–Nara Discovery Pass & Railway Ticket combo.
- Kintetsu Rail Pass (2-Day Ticket between Osaka-Namba and Kintetsu-Nara) is included only when you choose the Osaka–Nara Discovery Pass & Railway Ticket combo.
If you don’t select the combo, remember: public transportation costs are not covered.
Maintenance note: plan around the HEP FIVE Ferris Wheel inspection
If your trip lines up with Thursday, August 7, the HEP FIVE Ferris Wheel will be out of service due to scheduled inspection. Operations resume as soon as the inspection is complete, but there’s no set time.
So treat the Ferris Wheel as a bonus, not a requirement, on that date. Your northern route still has plenty to do if you swap it for another stop.
Should you book the Osaka–Nara Discovery Pass?
Book it if you:
- Want one QR-code admission plan for lots of Osaka and Nara stops
- Will hit multiple included attractions across two days
- Are willing to schedule Umeda Sky/Floating Garden Observatory before 5:00 PM
- Like structured sightseeing without buying separate tickets one by one
Skip or reconsider it if you:
- Plan to do Umeda Sky later in the day and won’t adjust your timing
- Want total freedom to move independently as a solo traveler (because of the collective-use rule)
- Are planning the southern route without a rental car, since it requires one
- Expect the pass to cover train and bus fares (it doesn’t, unless you chose the combo options)
If you’re smart about timing, this pass can make Osaka and Nara feel much easier to manage. Just don’t treat the 5:00 PM cutoff as optional.
FAQ
How much does the Osaka–Nara 2-Day Discovery Pass cost?
It costs $24 per person.
Where is the pass located for pickup or use?
It’s located in HEP FIVE Mall in Osaka.
Is the pass valid for a full 48 hours?
No. It’s valid from a facility’s opening time to the final entry time on your day of use and the following day, not a full 48-hour window from your first scan.
Can I re-enter the same facility more than once?
No. Free entry is allowed once per facility, and re-entry to the same facility is not allowed.
Is Umeda Sky Building free all day with the pass?
For the Floating Garden Observatory, free admission with the pass is valid only before 5:00 PM.
Does the pass include train and bus fares?
No. Public transportation costs are not covered in the price. A metro/bus pass and a Kintetsu rail pass can be included only when you choose the relevant railway-ticket combo option.
More 2-Day Experiences in Osaka
- 2-Day Bus Tour to Shirakawago & Hida No Sato Winter Illumination★ 5.0 · 5 reviews
More Tour Reviews in Osaka
- Osaka Go Karting Tour with Funny Costume★ 5.0 · 2,658 reviews
- Osaka Castle: Museum and Tower Entry Ticket★ 4.5 · 2,380 reviews
- Osaka: Shinsekai Food Tour with 13-15 Dishes at 5 Eateries★ 4.8 · 2,204 reviews
- Osaka Food Tour: 13 Dishes at 5 Local Eateries★ 5.0 · 2,149 reviews
- Hungry Osaka Street Food Tour:15 Tastings & 3 Drinks with a Local★ 5.0 · 1,727 reviews
A Day Among the Nara Deer
- Ancient Capital Tour: Kyoto and Nara Highlights from Kyoto/Osaka★ 4.5 · 332 reviews
- Kyoto and Nara Day Trip from Osaka★ 4.0 · 175 reviews
- Full Day Guided Tour to Kyoto and Nara from Osaka by Van★ 5.0 · 144 reviews
- Discover Himeji, Kobe and Nara from Osaka★ 5.0 · 101 reviews
- Kyoto & Nara Private customized tour with English speaking Guide★ 4.5 · 99 reviews
The Newest Osaka Write-Ups
- Private Photoshoot in Osaka with a Professional Photographer
★ 5.0 · 3 reviews - Osaka Early Morning Osaka Castle Tour Avoid Crowds
★ 5.0 · 3 reviews - Nara Private Tour with Pick and Drop and English Speaking Driver
★ 3.5 · 3 reviews - Osaka: Modern Vegetarian Sushi Cooking Class
★ 5.0 · 3 reviews - Nara Day Trip from Osaka with a Licensed Guide
★ 5.0 · 3 reviews
Nara Day Trips from Osaka, compared.
 ★ 4.5Ancient Capital Tour: Kyoto and Nara Highlights from Kyoto/OsakaFrom $90332 reviews
 ★ 4.0Kyoto and Nara Day Trip from OsakaFrom $198175 reviews
 ★ 5.0Full Day Guided Tour to Kyoto and Nara from Osaka by VanFrom $96144 reviews
 ★ 5.0Discover Himeji, Kobe and Nara from OsakaFrom $91101 reviews
 ★ 4.5Kyoto & Nara Private customized tour with English speaking GuideFrom $54999 reviews
 ★ 4.7OSAKA-KYOTO-NARA Highlight Customized Trip With Hotel PickupFrom $57850 reviews
 ★ 4.5Kyoto and Nara UNESCO Highlights Full-day Tour From OsakaFrom $6250 reviews
 ★ 5.0From Osaka: Nara Private Tour with Meet-Up at Your HotelFrom $14049 reviews
Browse the lists this tour appears in